Turns out the noise reduction algorithm broke the image into segments called tiles. It worked its noise reduction magic on each tile individually but sometimes the tiles didn't rejoin smoothly. A tricky and hard to find bug, judging from the number of posts that appeared in the forum while they were fixing the problem.
That bug has been mostly swatted--noise reduction still doesn't work on JPGs-- but with code change set 135 we can now test and work with RAW files. ( found at http://www.visualbakery.com/RawTherapee/Downloads.aspx )

ISO 6400 f8.0 1/25 sec EV -0.7
This snap was taken at Old World Wisconsin in the back of a barn during a demonstration of 19th century cow milking. The lighting wasn't insanely difficult but as you can see from the camera settings I was pushing my D7000 to get this shot.
So how did RT do when I tried to improve the image.

YUP! RT noise reduction works,
The noisy image to the left is without any noise reduction, just a +0.7 exposure correction to compensate for the -0.7 correction I did in the camera to move the shutter speed up to 1/25 of a second. The NR settings of the much cleaner image on the left are shown below.
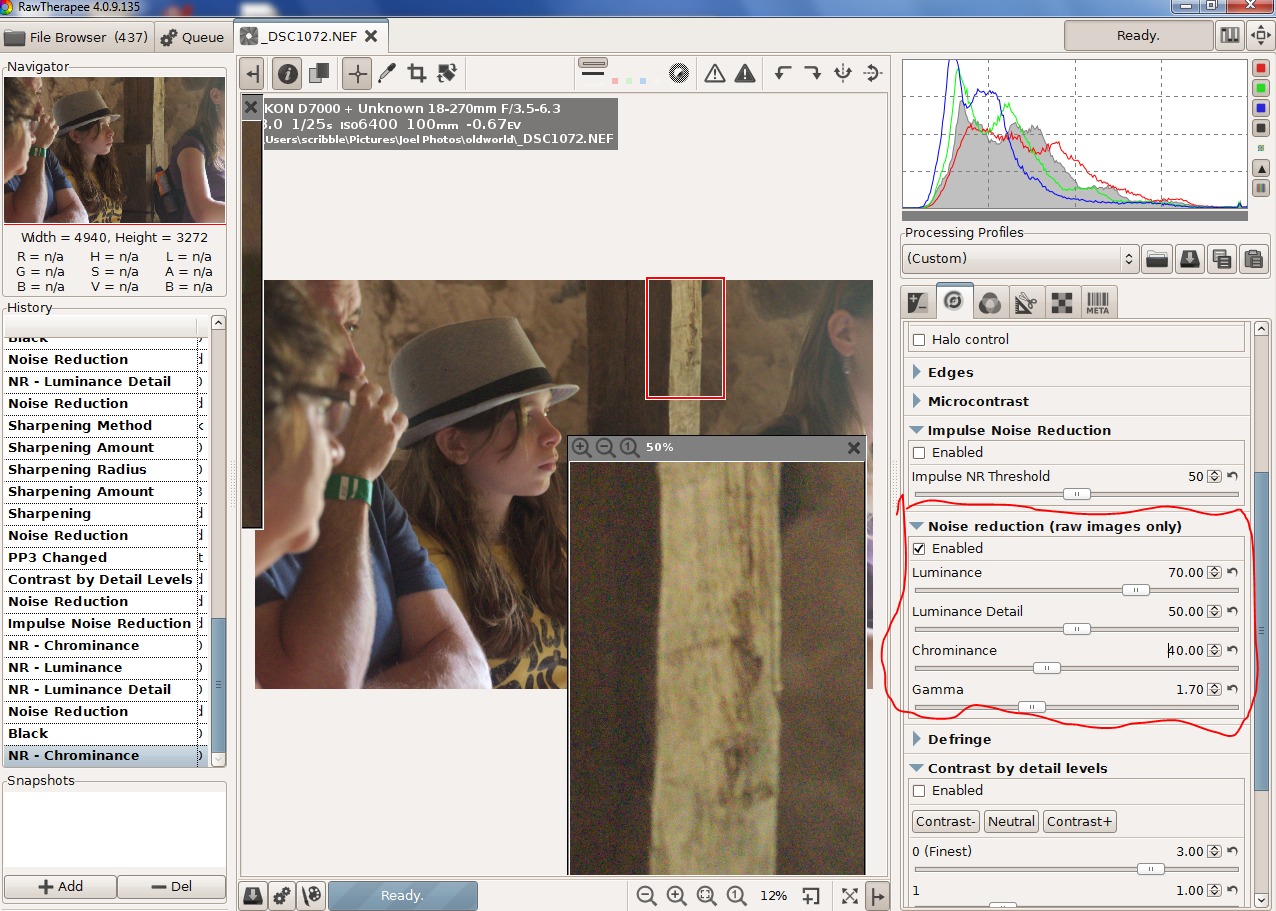
I adjusted the Chrominance slider first. Use a 400 % box on something with little detail like the girl's cheek. Find a setting where all the color speckles disappear and then add a bit more. This slider works on the A and B LAB channels that only contain low resolution color information so you are not blurring detail. With my D7000 at ISO 6400 about 2/3 of the noise was chromatic so that was a no fiddling around adjustment. Nice

For the other two sliders I picked a region with fine detail, the wood grain on the 2x4, and adjusted them to match the detail in my conversion to the detail in the jpg out of the camera. The Luminance slider controls the strength of the noise reduction. The Luminance Detail slider sets the threshold on another algorithm that does its best to seperate real detail from random noise. In this image Luminance 70 and Luminance Detail 50 worked well.

So where are we at now. The left top line profile is from a RT conversion with no noise reduction.
The one below that is from the camera's jpg where I used the D7000's normal noise reduction setting. It also is very close to the noise I measured when I used RT's default settings.
The top right profile is from my detail preserving image. And finally the insanely low noise ISO 6400 profile below it is from when I went all out with a Luminance of 90 and a Luminance Detail of 6 to see how low noise I could go.
How bad was that image. When I displayed it side by side with my tuned image I didn't have to pixel peek hard to see I had lost detail. But if I had emailed it to Fedora Girl I'm sure she wouldn't have screamed "WHERE IS MY DETAIL" and immediately sent it into the bit bucket. We RT users are after the very best quality but in this world drowning in imagery, I'm afraid most viewer don't notice.
So great job RT folks and especially Emil who designed the algorithms and did the coding.
No comments:
Post a Comment