Last Wednesday during this hottest on record Midwest heat wave Charlotte and her Mom and I drove in air conditioned comfort to tour Charlotte's favorite museum, the Milwaukee Public. There Charlotte became my guide. My Nikon D7000 hanging around my neck, she led me from exhibit to exhibit.
Excellent exhibits, I'll admit. But from a low light, hand held photographer's point of view, the trip was not a successs. The lighting, or lack of it, was the pits. Still, I snapped away and came home with a few GB's of images, hoping for some lucky shots.
What I discovered when I went to process the RAWs wasn't luck exactly. I've been following the development of RT's new noise reduction routines for over a year and I check their forum regularly. The developer's denoise compile I downloaded isn't bug free and only works with 64bit Win7, but with my new computer its match with my museum snaps was perfect.
This snap was taken at a 1/4 sec and ISO2500. Charlotte held her pose. Image stabilization and I held the camera steady. After a 2 EV boast in exposure and a tone curve, it's a decent image to see how well RT's latest and greatest works. There is no manual entry yet but the routine turned out to be more automated than I expected and easy to work out.
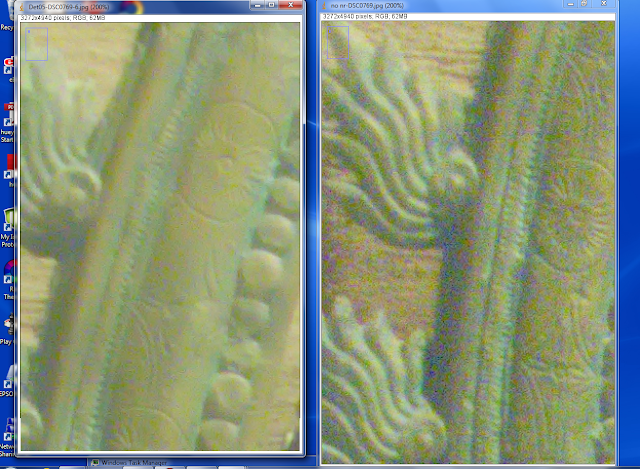
The luminance slider sets the maximum strength of the noise reduction; the luminance detail slider sets how much of that maximum strength is actually used. At a detail setting of 100, no or very little noise reduction is applied. At 5 and with a strength of 20--the settings I used here--the noise reduction was both artifact free and very impressive. But I was clearly losing detail as you can see in comparison with an image with no noise reduction (right) below
I'd gone too far. Below is a tuned version where I tried to preserve detail.
I kept the luminance setting at 20 but ran the detail slider up 60, added more unsharp mask sharpening and set the gamma to 1.4 to bias the noise reduction towards the shadows. Below is another comparison with the no noise reduction image. Beside being significantly less noisy the tuned image shows as much and perhaps even more detail than the no noise reduction image. Click on the image and go to the original size if you want a better view.
(note--if you download this build from http://dl.free.fr/getfile.pl?file=/unoeMxPZ RL convolution sharpening is broken, When you process an image in the queue the software grabs all the available memory and crashes when it can not find more.)
To finish off this first look here are the respective noise profiles--05 detail on the top, tuned detail in the middle and no noise reduction on the bottom.
While this is not the released version and there are still some bugs to work out, I'm very impressed. So congratulations to everyone involved.


Dude, I'm sorry you have to shoot at ISO2500.
ReplyDeleteThank you Scribble, nice work.
ReplyDeletea question: how long it takes for you to convert ?
And for that anonimous dude: ISO 2500 is needed for theater shots and in similar instances when flash is not an option, or to freeze motion in sport shots etc.
Also an effective NR helps to get a cleaner output in shadows even at lower ISO
glacort
ReplyDeleteI upgraded recently to a 64bit 4core Intel i5 machine with 8GB of RAM. So the conversion times are not insanely long even when I'm converting 16MB D7000 RAWs. They typically run 1 to 1.5 minutes. Without NR they run 10 to 15 seconds.
Times are significantly longer on my 32bit laptop, about 3-4 minutes. I also have to kill everything except the queue or RT crashes because of memory problems.
Bottom line--Patience required if great images are to be dragged out of the low/no light mud.
anonymous dude
ReplyDeleteFirtt image taken at the equivalent of ISO50000 ie. 9 stops underexposed. Using a camera that officially crapped out at ISO1600.
http://scribble-jpc.blogspot.com/2011/01/too-good-to-be-true_23.html
ignore the ISO1600 sentence. This was done with my then brand new D7000 not my older D60 like I first thought.
ReplyDelete