Showing posts with label RawTherapee tutorial. Show all posts

Saturday, October 19, 2013

Creative Distortion with My Lady Clockwork


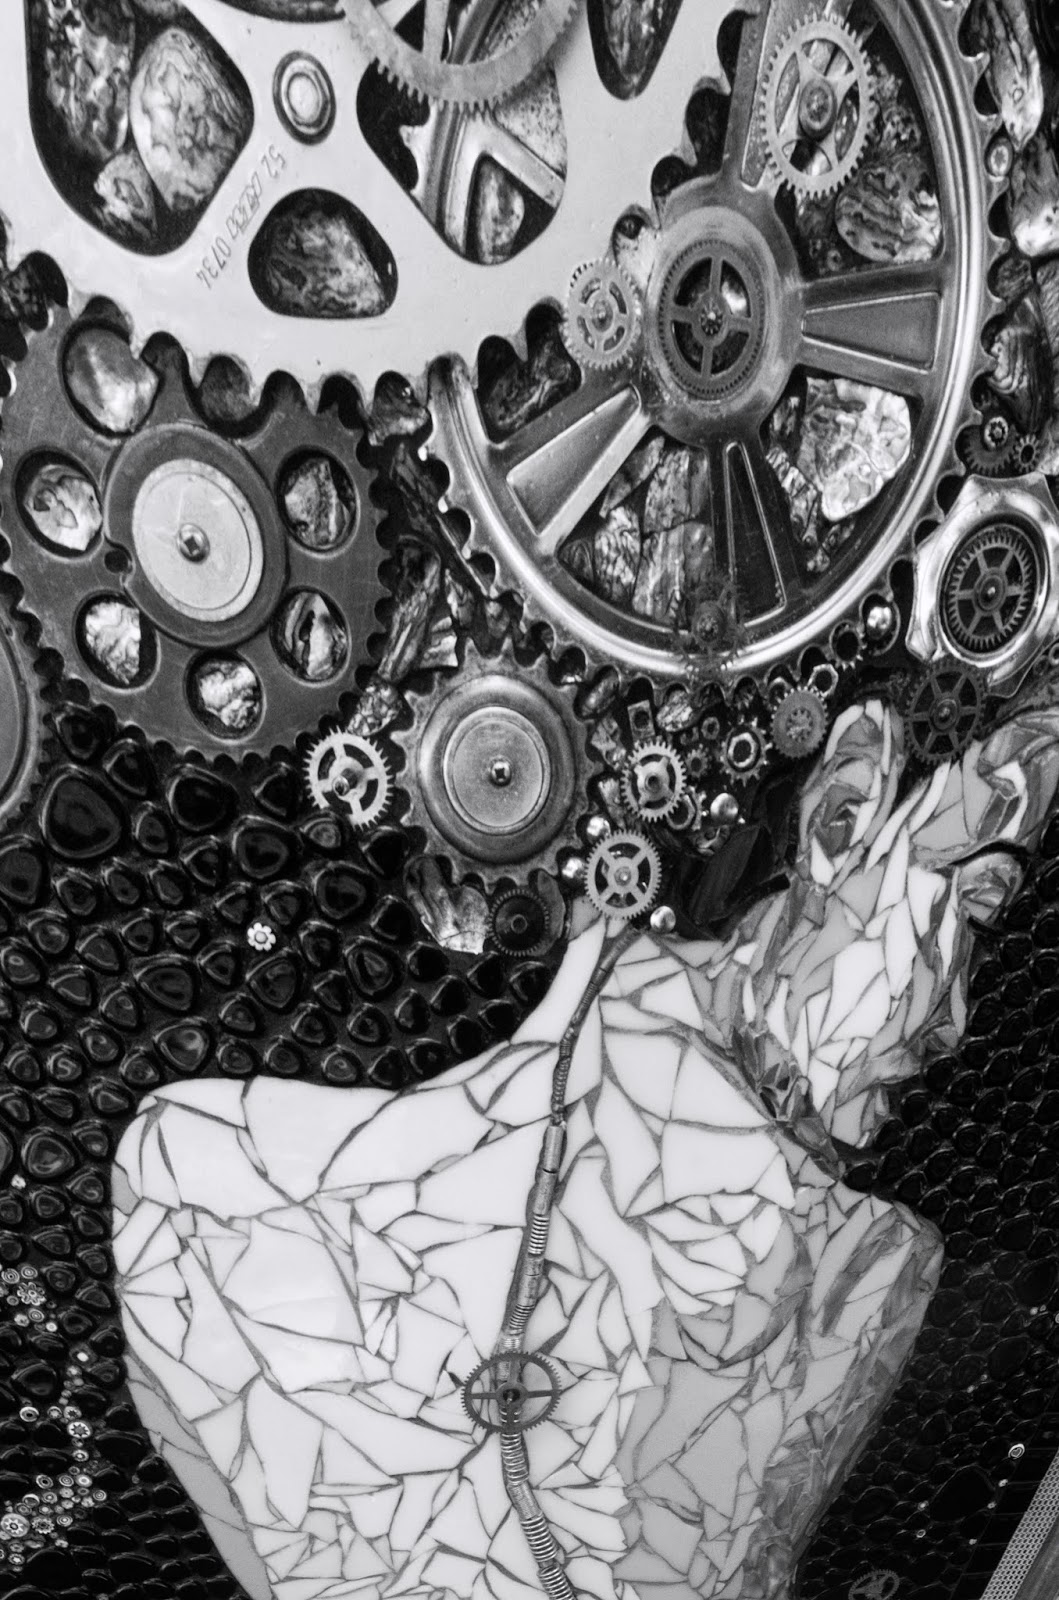
I found this hanging from the side of a booth at an art fair this summer. An image worth a touch of RawTherapee. After adjustments with CIECAM02, my usual workflow that I have blogged about several times I ended up with a more colorful version of the of the image. It was okay but I felt it need something more. So I went to the prospective correction section and went a bit wild with the sliders


My first attempt created the elliptical gearing fot the right artistic touch but the triangle of grey at the lower corner distracted form the composition.


With different slider adjustments, a rotation and finally a conversion to B&W by bring the CIECAM02 chroma to -100 I ended with this image.


I posted this on flickr 16 hours ago. When it came to filling out the tags and picking the groups I couldn't quite decided how to publish this.  So, for a bit of fun and because My Lady Clockwork is naked in her stain glass beauty, I added the tag nude.

Nude is a popular search tag.  At last count I've picked up 313 'what-in-the-expletive-world-is-this' views with 95% coming from a search for a nude something or other.

And finally since art can never be totally finished I played around after my posting and came up with this which I think is a tighter and slightly better composition


Friday, May 10, 2013

A Study in White and Blue

On a bright and warm May day earlier this week-today is grey and chilly- I went to the Olbrich Gardens to field test new optics. Last Saturday I had bought an oldish Nikkor 50mm f1.8 lens that uses my D7000's internal motor to focus along with a set of extension tubes with all the electrical and mechanical connections needed  to completely control the lens. The hidden artist do-something-different challenge I took on was to leave my zoom lenses in the camera bag and shoot with only the 50 mm lens.

The magnolia trees were in bloom and the sky was blue with wispy clouds. My original shot with RT's neutral profile. Obviously it could use a dose of RT magic.


After a white balance on the magnolia leaves and a default profile.  This version is better but the hidden artist within wanted a bit more ump


The HSV Equalizer tool has been updated  and is now less finicky to use. Dragging its blue bar up or down to change the value or lightness of the blue in the sky seemed appropriate. Here is up. It didn't make a massive amount of difference since the sky's value was already high.


 And here is down which did. Notice how the  blue channel has shifted to the left in the histogram


With the value curve reset I played with the blue saturation curve. Here is up.


And here is down. 


With this image it may not be immediately obvious but a judicious use of both the value and saturation curves is a great way to improve skies without going over the top like I'm doing now. The Hue curve rotates the color wheel to create totally aliens skies. This green version is one of many.


After settling on a moderate increase in the sky's value I went on to the CIECAM02 tool. A large contrast boost of 80 made both the sky and the tree far more dramatic.


And to lighten the clouds  I upped the brightness to 25.


To bring down the blues I played around with the Colorfullness curve.


And as a final comparison here is where I stated once again.


RT's color correction tools are the best around, period. So load up an image the could use a little sky magic and start dragging curves and sliders. I predict you will like what you discover.

Sunday, April 7, 2013

Hidden Artist Strikes Again


I started with this-a 1949 cover for the Saturday Evening Post painted by Norman Rockwell


After I did my camera and photographer twisting and twirling I loaded the image into RT using the POP  profile.  This new addition to RT uses tonemapping and CIECAM02 to add, surprise, surprise, pop to your image.

To prevent one problem, jet black splotches that appear in highly over exposed areas when tonemapping and CIECAM02 are used together, Jacques, the developer who added CIECAN02 to our toolkit (applause, applause) made changes recently.  He compressed the highlights for well exposed images taken with bright scene illumination, the highlighted value of 2000 standard candles per meter squared.

 While that fixed one problem it added a second. For less well laminated scenes like indoor scenes with over exposed vistas viewed through windows, or like the low illumination I used to create this image, the histograms never go above 75%.  White areas end up too grey.

 The fix is blindingly obvious if you understand the intricate working of CIECAM02. You adjust the scene illumination slider to match the image. The histogram moves to the right; you stop when it starts to clip.  But the rest of us who think a standard candle is the long thin one you push into a brass candle stick we tend to miss what's needed to be done.

Yesterday afternoon I discovered that undocumented fix. Not by some brilliance on my part. In a not-so-secret forum where RT developers hang out and talk RT programming talk, this was being discussed in issue 1827. So last night, me, a lowly user, dared to tell Jacques, the developer, that his technically correct tool tip needed to be rewritten. In the middle of our night and his morning-the time difference between Wisconsin and France-Jacques wrote back saying of course he would do it

Took less than 8 hours. So if any users of commercial programs such as Lightroom happen to stumble over this blog please put in a request for the perfect fix you've been waiting to use. Then let us know how many weeks/months/years/eons it takes to get an answer back. RAWTherapee might bring on slider shock and have its quirks, but its developers listen. And when it rocks, it Rocks!

EDIT.  An Oops. Or semi Oops. What was less than blindingly obvious when I wrote this was that the real  cause of the problem was a bug in the CIECAM02  calculations. With build 4.0.10.69 that has been fixed, the problem no longer exist and the histograms no longer hang up at 75 percent no matter where you set the illumination slider.


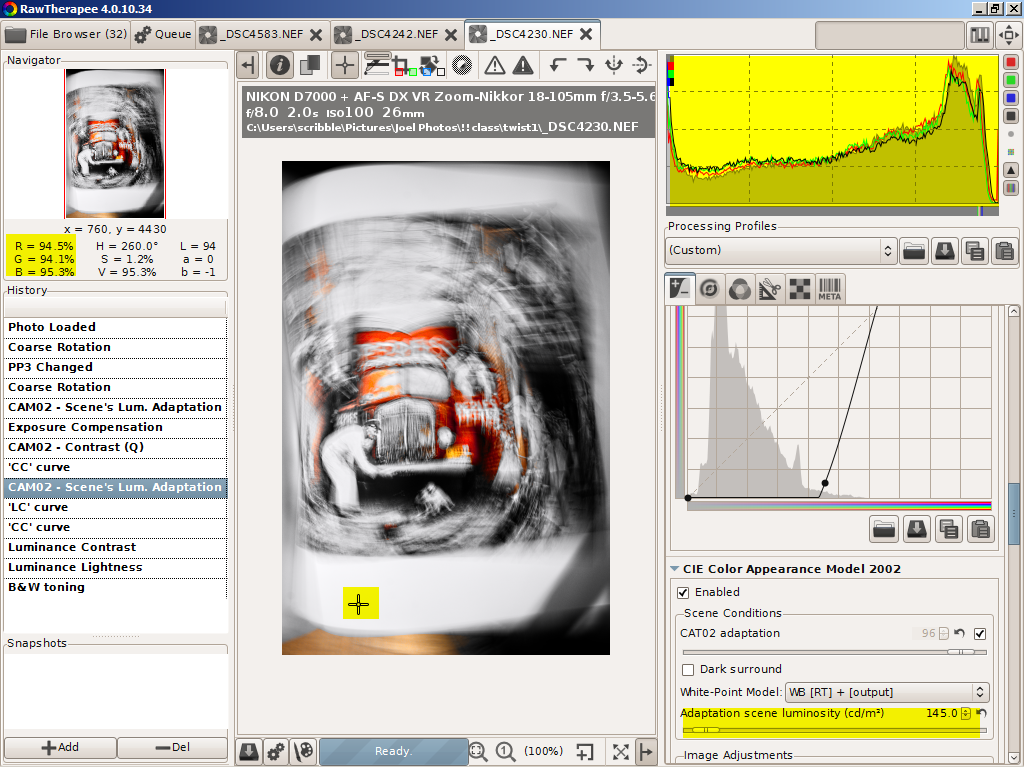
A two slider adjustment in scene illumination and exposure moved the red channel to the clipping point and lightened the image.


A CIECAM02 contrast boost darkened the edges and clipped the red channel

.
A wild LAB custom CC curve made big changes to the image and brought all the channels together. Not the usual way to set a white balance.


A final scene illumination of 145 cd/m2 sets the overall image whiteness.


Two curve and slider adjustments didn't change the image that much. Running the chromaticity to the max, however, gave me a wild effect I could use.


The final masterpiece ready to be printed and matted for the masterclass.


And because it is also neat the black and white version created by clicking  BW tone mapping in the LAB section.

Saturday, March 30, 2013

The Artist Hidden Within

I'm taking a master class on how to drag the 'artist hidden within' out into the daylight. So for the next several weeks that hidden artist will be raising his sarky head and inflicting his 'masterpieces' upon the innocent blogosphere.

As any regular reader of this blog knows, the non hidden artist's aesthetic tends towards photographic perfection, the sort you pixel peek at 100% or higher to see. Accurate colors, perfect sharpness, noise freedom has reigned here.

The hidden artist, on the other hand, favors this.


The original Playboy style image that posed for the 'artist within' is from a 40 year old Petersen's Master of Contemporary Photography book about Bert Stern.  If the name Bert Stern isn't instantaneously recognizable  he's the photographer whose 1950's ads turned vodka, then a cold war Russian commie pinko exotic, into an all American drink. This really dry vodka martini ad was worth $4000 plus travel expenses in 1955 bucks. If his reputation has slipped a little since then he lived very well in his time.


Enough dry history. Here is the 'hidden artist's' RT workflow.

First select a colorful page or double page image to mangle. Set the camera to manual, to ISO100 or lower, to between 2 to 10 sec exposure and to whatever iris opening gives a reasonable photo. Move camera while snapping the photo. Better yet, twist, roll and yaw the photographer while snapping  the photo. Since you will have no idea what you have on the card, do this a dozen or more times. Load  the most interesting photo into RAWTherapee. Or in this case, one that didn't violate Blogspot's prohibition of full frontal nudity. Finally start the masterpiece making.


This brought out the color in the wide tie, the subject of the photo.


A hue slider adjustment that shifted the colors towards green. The CIECAM02 algorithm is 'all'.


Playing around with the CIECAM02 sliders brought us to this color mixture.


Since the colors aren't changing much 'the artist within'  turned this into a tiff file. Then he loaded that back into RT for further processing.


This lighten the background.


With this 'the artist within' laid down his mouse.  And left it to 'the outer guy' to write this blog post. He liked this version the best.


RAWTherapee 4.0.10.36 is now here. Besides speedups and bug fixes, it offers a new set of packaged profiles and two new demosaicing algorithms intended  for use with HighISO images. (Big Grin)

http://www.visualbakery.com/RawTherapee/Downloads.aspx

Saturday, March 23, 2013

Shoot at ISO21000--Print at 30 by 45 inches

Sounds insane.  ISO21000 noise. Huge print size.  Welcome to the world of RAWTherapee noise reduction.


Rhianna is letting the world know she just bowled a strike.


The gory photo details. The camera was set to ISO6400-- which is just a conventional way of saying the D7000's sensor's true and only ISO100 signal is preamp boosted  by a factor of 64 before it enters the A/D.    Since the photo had to be boosted again by an exposure compensation of 1.8EV to shift the red histogram I multiplied the camera's ISO by 3.24 (1.8 squared)  to get a correct noise IS0 of 21000.

Ain't a cheating fudge factor. That's how sensor physics works.

Now the triumph of  RT noise reduction. But first here is what not to do.


I set the exposure compensation correctly before I went to the CIECAM02 tools to improve the color, contrast and lightness. But I forgot to return to exposure to readjust the histograms  When I caught my mistake, I checked the red color channel ( box at top) for blooming (red areas).  Because I liked my CIECAM02 fine tunings,  only one channel was effected  and the blooming area areas weren't in any critical part of the image (see http://scribble-jpc.blogspot.com/2013/02/rescuing-really-important-snapshots.html ) I decided to go with my mistake. After all I was getting a WOW Signal to Noise of 20!


Wrong move.  After wasting a bunch of time and discovering a few nagging inconsistencies  I corrected the exposure comp.  One measurement later and I discoverer the real double WOW WOW S/N was to be 28!!

A few points on experimental techniques. I took the noise line profile off Jilly's arm because that area has constant color--the curves are flat-- and the arm is close to the center of the tonal range--95 in a range of 0-255. These curves have to come out flat or don't bother doing the extra work to come up with a numerical signal to noise.  You will be measuring bumps and slopes.  Not the noise.

Looking more closely I should have shortened the length of the line profile of the last measurement  to get rid of the bump at the beginning. That error added about 0.5-1 to the last StdDev (standard deviation) number.  That's why I averaged 7 measurements to clean up these errors. Even without these moments of carelessness, remember we are dealing with noise. Three measurement are a minimum, 7 to 9 are better and a 100 measurements  would be an insane overkill.  We are doing a square law experiment and the Law of Diminishing Returns kicks in with the second measurment

Plus what's so wow about a S/N of 28. Why not 280 or even 2800. If you got  the bucks to buy the camera, like the Hubble Space Telescope or the Kepler Cosmic Background Radiation Telescope in the news recently, you can go for those high S/N ratios.  But for the rest of us, with this image taken under these exposure conditions, a S/N of 28 does equal a 30X45 poster pined to a bedroom wall.


With modern tech we can pixel-peep (and complain about what we see) far too easily. Rhianna's face is 8 inches wide on my super calibrated monitor (something that the world can't see --- for the complaint  http://scribble-jpc.blogspot.com/2013/02/in-search-of-perfect-eyeball-monitor.html ) . It is 3 inches on a 11 by 14 print I had made using the older 4.0.9.185 noise reduction.  Do the math and this is what you will see on a 30 X 45 inch wall poster.


That  print had a S/N of ~15.  If you were looking for noise there was a hint of it on Rhianna's face and in the brown area under the big number one in the background. But it's nothing that jumps out at you. I sure Rianna's mom won't complain when I give her the print next time I'm over in her part of the city.

EDIT--If you looked at this post before you might notice that Jilly has suddenly morphed into Rhianna.
Rhianna is Jilly's stepsister. They both live across the street from Charlotte. I got their names mixed up. Sorry girls. :-(

After I posted this I remember I do have a big display my flat screen LCD TV with its port in the side for usb sticks and memory cards.  When I displayed this image big it looked just like I said it would from my calculations.


The details from the pp3. I started with the HighISO profile. The exposure  comp of 0.88 I set. I may have fiddled with that other setting. Or they may have come with the profile.


[Exposure]
Auto=false
Clip=0.02
Compensation=0.88
Brightness=2
Contrast=22
Saturation=5
Black=332
HighlightCompr=0
HighlightComprThreshold=33
ShadowCompr=50
CurveMode=Standard
CurveMode2=Standard
Curve=0;
Curve2=0;

The image needed some sharpening. Except for 'only edges' the setting are the defaults. If it wasn't for the 'only edges' algorithm I never would have dared using sharpening on a high noise image.

[Sharpening]
Enabled=true
Method=usm
Radius=0.5
Amount=125
Threshold=20;80;2000;1200;
OnlyEdges=true
EdgedetectionRadius=1.8999999999999999
EdgeTolerance=1800
HalocontrolEnabled=false
HalocontrolAmount=85
DeconvRadius=0.75
DeconvAmount=75
DeconvDamping=20
DeconvIterations=30

White balance off Jilly's shirt

[White Balance]
Setting=Custom
Temperature=3058
Green=0.80500000000000005

The color and appearance fine tuning

[Color appearance]
Enabled=true
Degree=100
AutoDegree=true
Surround=Average
AdaptLum=16
Model=RawT
Algorithm=JC
J-Light=27.100000000000001
Q-Bright=-1
C-Chroma=-5
S-Chroma=0
M-Chroma=0
J-Contrast=44.5
Q-Contrast=64.5
H-Hue=0

The HighIso defaults. I could have fiddled with them for a better S/N but why bother. My 30 inch printer-imaginary- is out of ink-imaginary- and will stay that way given the cost of feeding a real printer. For five bucks and change I can get a 12 by 18 inch print from my local Woodmans-one that matches the image on my screen. As long as I switch the room lights back ovet to 5000K spots. Perfect color management ain't easy.

[Directional Pyramid Denoising]
Enabled=true
Luma=50
Ldetail=50
Chroma=50.689999999999998
Method=Lab
Redchro=0
Bluechro=0
Gamma=1.7


Find RAWTherapee  4.0.11.1 here
http://www.visualbakery.com/RawTherapee/Downloads.aspx

For an excellent tutorial on noise by Emil, the guru behind RT's new noise reduction systen
 http://theory.uchicago.edu/~ejm/pix/20d/tests/noise/noise-p2.html


Wednesday, February 27, 2013

Slider Shock or What Do I Do Now

You have  RT on the screen in front of you. You have read the first pages of the manual and now have the file browsers loaded with a directory full of images. You have selected your first RAW file. You are ready to fix problems.  Your snapshot will become a sent-to-all-the-grandmas minor masterpiece.

Then it hits you. Big Time.  Slider Shock!!. You think "Never Never in a Zillion years will I Learn how to use All those Sliders and Check Boxes."!! You mutter "I want my money back"! Then you remember RawTherapee is free.

Happen to everyone. Even me. And back then there were a bunch less sliders. But by now I've discovered the big RT secret.  Learning how to use all the sliders is for hang-on-the-wall-and-be-awarded-the-ribbon masterpieces. For the send-to-grandma ones you only use a few sliders. As for the rest--I must confess it wasn't until my last post that I needed to know much of anything about what was going on inside the RAW section. You can pick up most things as you go along.


This is a common exposure problem. Too light outside the window. Too dark inside the kitchen, The only thing correctly exposed  is the flowers on the window sill.  

The send-to-grandma workflow in seven easy steps:


Exposure compensation to 1.00.  This lightens Charlotte-the grandma interesting subject--but blows out the outside  foliage.


Enable HighLight Reconstruction. Because we are working with sky peaking through foliage I used the blend mode. The highlight recovery sliders-out of the picture- are at their default settings.


Now we are dealing with what I am beginning to think of as the twin power tools of RT. The four entries in  the history box appears when you set up Tone Mapping and CIECAM02 to work together. Just follow the steps in the Tone Mapping tool tip.


I used the control cage version of the Brightness curve and dragged it up until the snap was brighter than I wanted.


I fine tuned the snap with the Brightness and Colorfulness sliders. This shows the setting I decided to go with.


Rather than loading the snap into the queue. I copied my new procedure to the clipboard.


Finally I went back to the file browser, selected raw files with similar exposure problems, pasted my procedure and sent them all to the queue to be turned into grandma happy jpgs ready to be printed or emailed.

A couple of the jpgs that came out of the queue.


Not hard at all,  If you want to do additional work --a crop for instance--load up the raw files again. They will come up in 'last saved' mode ready to be worked on.