I shot this a while back at the Villas Zoo during its hundredth anniversary celebration. The Young Shakespeare Players were putting on a performance of The Winter's Tale in the zoo's meeting room. I caught these performers in a darkish corner and ended up with a not particularly exciting ISO1600 snapshot.

But after some very quick editing I turned the snap into this.

How quick? Here is my workflow.
1-loaded the snap into RT's default mode
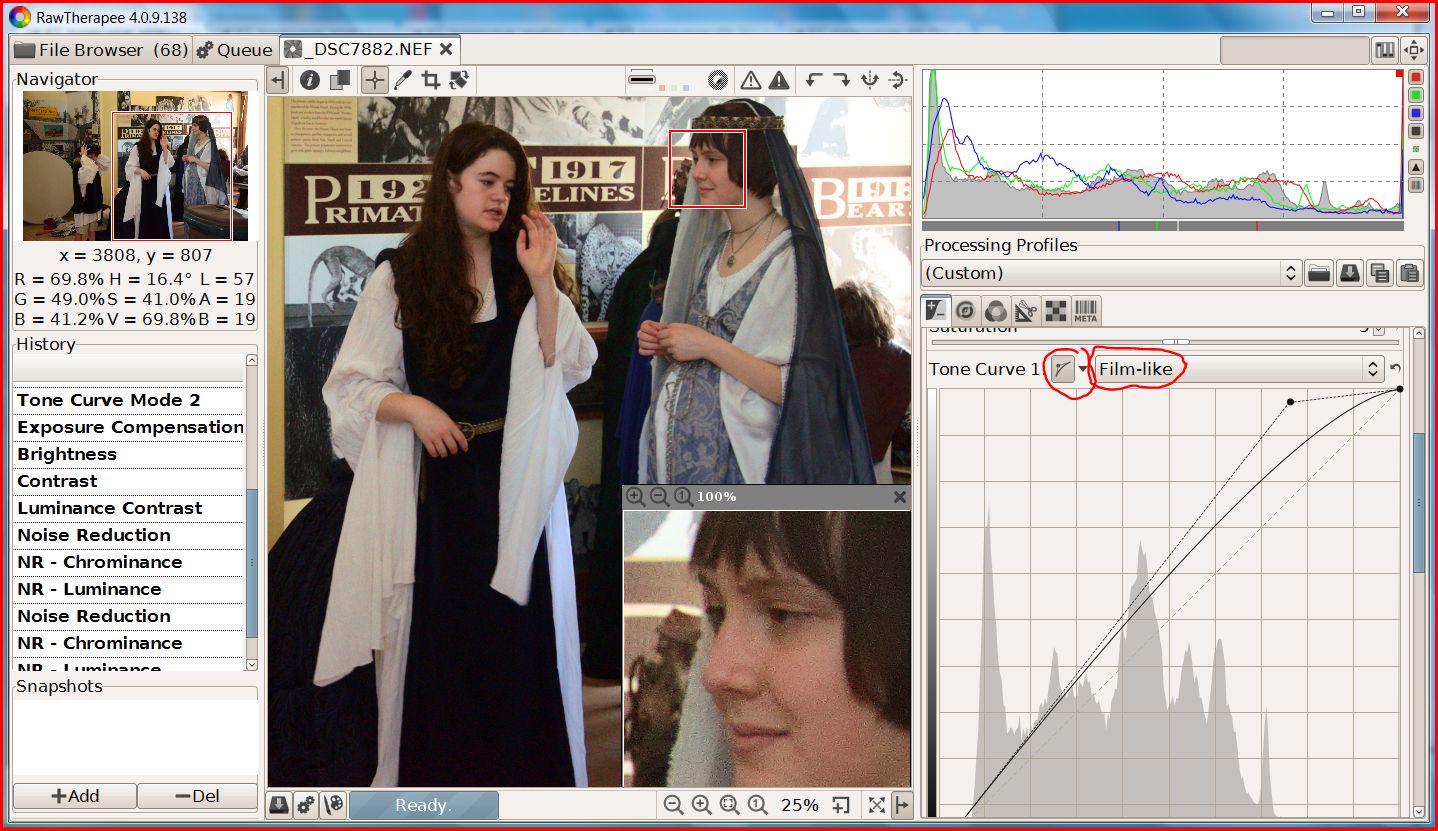
2-set the highlights with a single drag using curve 1 of the new dual tone-curve set in the Film-like mode
3-set the shadows with another single drag using curve 2 in the Weighted Standard mode.

4--adjusted the exposure slider to move the histogram to the left for saturated blacks in the actor's hair and costumes.
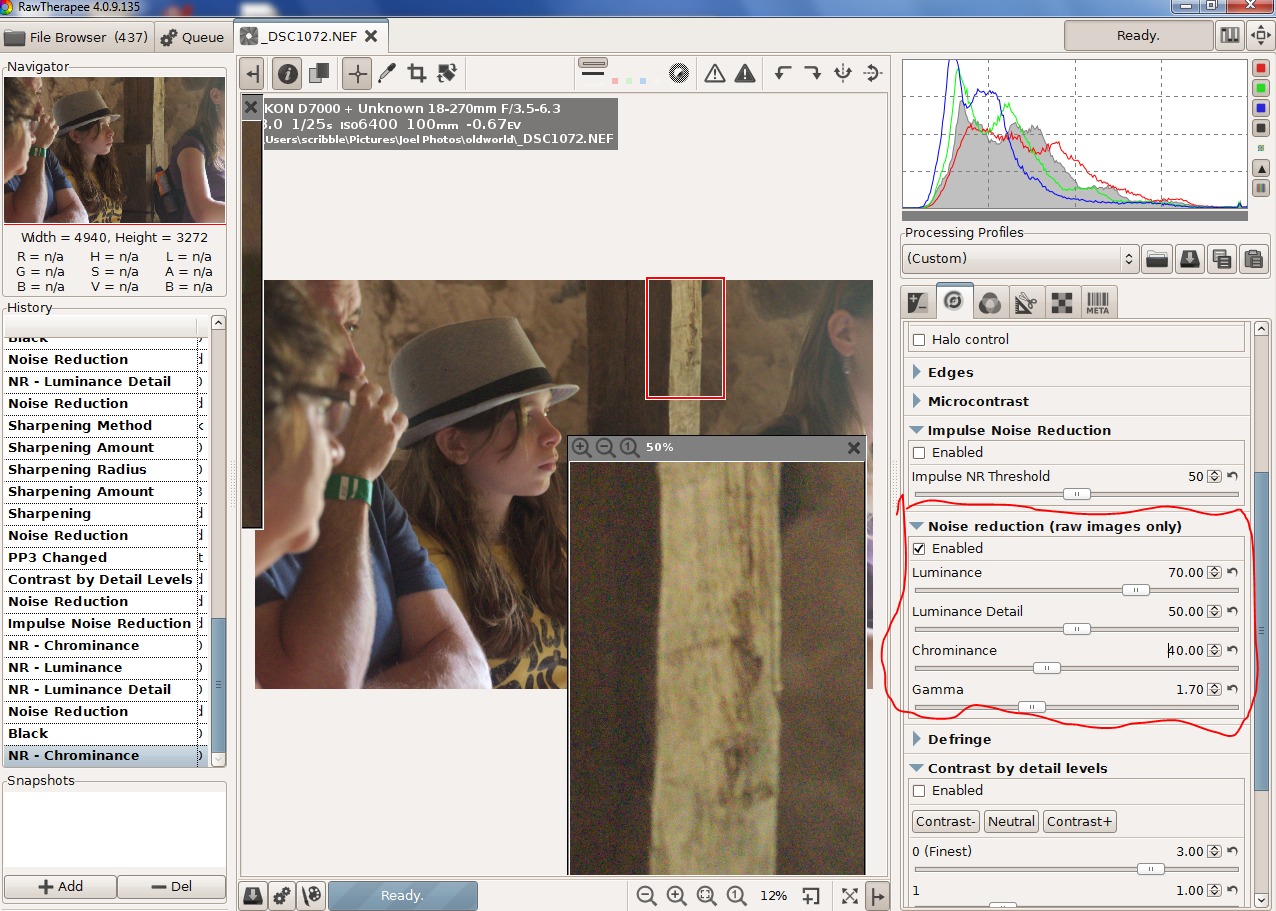
5-dragged noise reduction sliders to roughly the settings I used for my last blog post.
6-developed and then cropped the finished image in Irfanview. Why Irfanview? Because in my excitement to see a final image I ignored the clutter surrounding my intended image.
Total working time now that I know what to do --two or three minutes per image Be less if I batch process the other ISO1600 snaps I shot before the play began. Not quite a one click clean up but RT is getting close. Plus the results are-- pure magic!
Two things you learn when you first take up image processing:
1-unless you have developed perfect technique, usually after decades of professional photography, images straight out of the camera improve with an S tone curve.
2- RGB colors will shift when you apply your tone curve.
1-unless you have developed perfect technique, usually after decades of professional photography, images straight out of the camera improve with an S tone curve.
2- RGB colors will shift when you apply your tone curve.
Applying a S-curve multiplies the color number in all three color channels by whatever numbers are created by the tone curve. Consider the RGB color 75,128,175 as an example. With a curve fixed at the grey point, 128, the red value will go down, the green will stay the same, and the blue will go up creating a different color. Since images and tone curves are unique designing a reasonable algorithm that can follow and corrects these color shifts becomes near impossible .
LAB mode is different. Tone curves in the L channel doesn't shift color. Unfortunately, correcting skin tones and the like with LAB's A and B channel curves is also near impossible. But with the RT's four HSV tone curves, near impossible is moving in on routine.

For those not familiar with HSV terminology the hue is the color. The chroma or saturation is the intensity of the color. The value is the brightness of the color. You can read off these numbers in RT's left history pane.
RT now has four different ways of creating a tone curve: Standard, Film-like, Saturation and Value Blending and Weighted Standard. I'll leave it to the RT programmers to explain the inner workings of the new algorithms in a promised tutorial because I suspect I'll get the details wrong. Whatever the details since you can mix and match the methods with dual curves you don't lack for ways to create excellent images.
EDIT: For more info on the four tone curve types you will find an updated manual at https://docs.google.com/document/d/1DHLb_6xNQsEInxiuU8pz1-sWNinnj09bpBUA4_Vl8w8/edit?pli=1
First why dual curves? In my example I created an S-Curve by combining two curves. This may seem like a needless complication--my first thoughts--until I saw how well and fast it works. And if you don't care for this new fangled innovation, set curve2 to linear and ignore it.
Below is a test image that one of the developers, Michael, posted. The differences are subtle and are best viewed at original size but in the dual curve version the skin tones blend in more smoothly as the lighting slides from highlights into shadows.

I haven't tested all the combinations in any systematic way but here are some tips I picked up from issue 1529 in the google code where many test images were posted.
Two standard curves (above) work well on skin tones.
Brightening with Film-like adds saturation and gives richer colors. So does switching to a wide gamut working space like ProPhoto. (I've tested this). But if you like your colors less vivid Saturation and Value Blending is the best choice.
Weighed standard for darkening and Film-like for lightening--my example--are a good combination for people pictures.
All methods work for landscapes. Selecting a mode depends on taste
Conventional S-curves work best with Saturation and Value Blend
Whatever curve modes you settle on, this unique feature is a major addition to RawTherapee's tool kit.
This version of RT 4, build 138, can be found at: http://www.visualbakery.com/RawTherapee/Downloads.aspx An updated manual is at: https://docs.google.com/document/d/1DHLb_6xNQsEInxiuU8pz1-sWNinnj09bpBUA4_Vl8w8/edit?pli=1