Showing posts with label RAW Therapee. Show all posts

Tuesday, August 4, 2015

Build 269-A final, for a couple months, wavelet tool

In earlier tutorials I've worked with raw files I've taken. Now, for several reasons including some consistent criticism that I haven't written the book that explains the intricacies of every slider and curve in tools as complicated as RT's wavelets, my tutorials will use raws and jpgs available on the internet. Then anyone can duplicate my setting and if they are interested in the other settings...go for it. Just come back and tell us if you discover something interesting.

My source is http://www.photographyblog.com/reviews/   They have a very large collection of raws, often with matching jpgs, from a multitude of cameras. The images I used for this tutorial shows a family group at the end of a subway corridor that are almost lost in the darkness and ISO128000 noise. A challenging shot that will showcase several RT tools.

The link for the jpg--we will compare the RT results with the straight out of the camera results--is
http://img.photographyblog.com/reviews/panasonic_lumix_dmc_g7/sample_images/panasonic_lumix_dmc_g7_36.jpg  The matching raw file is panasonic_lumix_dmc_g7_36.rw2

If you haven't upgraded to the windows build RT 4.2.269 or mac RT 4.2.270 do so immediately. If you are working with wavelets any earlier build will disappoint. Build 269 is stable (no crashes in about a week) and has several new features and bug fixes (a beta release for RT 4.3 maybe) plus some  new documentation.

Jacques, the chief developer behind wavelets and CIECAM has posted an updated RawPedia article in french. I'm sure is makes great reading if you are fluent in technical french, but after going through google translates  the meaning has been mangled in some sections. Example, when you come to a confusing sentence about a 'beach'  the correct translation is 'range' as in range of values. But for the most part it is  understandable and in this tutorial I will try to expand on what you will learn there

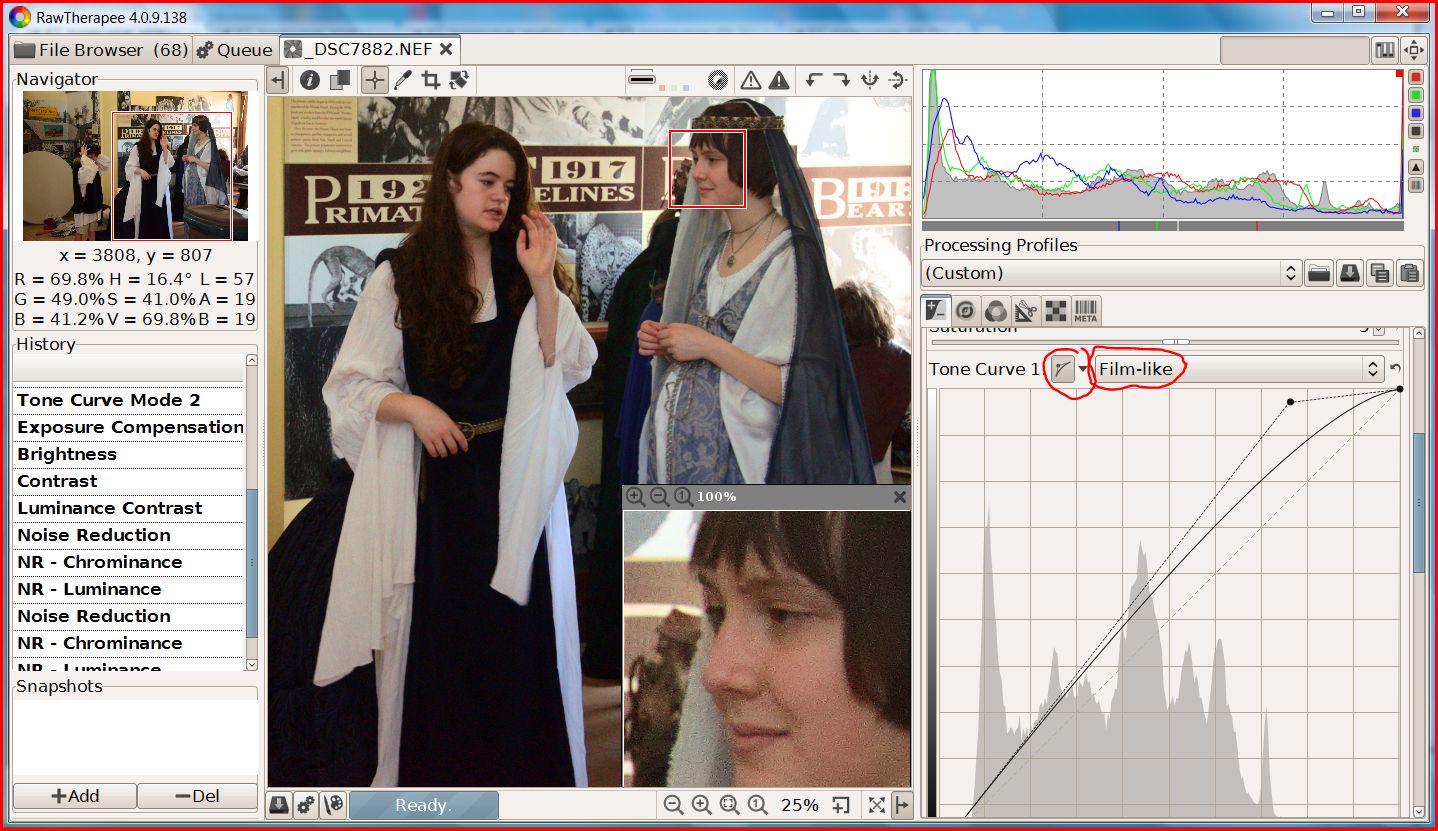
Wavelets are 3 dimensional. This mathematical third dimension is one of the reasons you see three sliders in many sub tools; two of which will confuse you because they seem to do nothing or make the image worse,  Some reasons for this behavior are:
1- they work much better with a different type of image
2-they are in the tool because Jacques and team have future surprises planned
3-they are  there because Jacques and team hopes we users will come up with some of the new surprises.

So if you hit a slider or curve that confuses you leave it at the defaults. They have been carefully chosen to work with the majority of images.

Enough talk, the workflow: Lets see what we can do with this  image


This is the matching jpg to the raw file we will use,  ISO 12800 and SOOTC, The goal is to create as decent an image as possible of the family group that are barely visible at the end of the subway tunnel without completely destroying the detail by the handrail  in the foreground

*****


I started with the the residual image tool. It got its name because it was what was left over after the calculations extracted the wavelets. What you do to the wavelets doesn't change it. And vice versa. You must recombine them either on your RT screen in real time in a 100% view or after a trip to the queue. That's one disadvantage when developing wavelet workflows. To chase down all the smal artifacts I develop test jpgs at key steps so I can look at them with other programs. Such as imageJ, a widely used and free NIH scientific image analysis program.

You can modify the residual image with non wavelet tools.  The shadow and highlight sliders lighten or darken their areas of the images. Their matching threshold sliders decides how large an area they effect. In past tutorials I recommenced  using CIECAM for contrast and chroma because of the tool's curves. Now with the new final tuneup curves ...you pays your  penny and takes your pick.

With this image  the shadow slider brightens the family group so I can see how bad the noise is.

*****


It is ISO12800 bad, clearly what Jacques calls high noise in his rawPedia article. I'm pleased that the noise reduction workflow I touched on in my Lorde tutorial  is now his recommended workflow. In the program flow the preliminary noise reduction in the second tab is now before the color conversion step. The wavelet denoise is now at the end and is intended to clean up any additional noise and artifacts created by sharpening and other adjustments.

*****


For the noise preclean I chose Lum 70 and Detail 30. Depending on the final results I can fine tune these numbers.

*****


To lighten the back area more I tone mapped the image. While wavelet tone mapping is less aggressive and more artifact free than RT's earlier version when it is combined with its gamma slider it can lighten and darken to both extremes.

It's worth mentioning that tone mapping works on the signal side of the all important signal to noise ratio just as noise reduction works on the noise side.  RT tone mapping uncovers noise in dark areas. It doesn't create it.  We are prone to saying the new full frame camera we bough to collect more light the light in its bigger pixels makes less noisy images,  Instead, when the exposure collects four times the light-- four times greater signal-- that is combined with twice the noise to double the signal to noise ratio. This may sound like super geek nit picking but I've seen forum discussions go off the rails into making wrong claims when people didn't understand or take into account the difference. A recent claim I've seen that tone curve also causes noise is one example.

*****


To bring back the sharpness lost with the initial noise reductions I used edge sharpening with edge detection checked. That sub tool  tames edge sharpening. The first slider, gradiant sensitivity, determines the amount of taming,  The second noise slider checks for nearby noise.  With low ISO images it has no effect; with high ISO images it increases the sharpening and can create artifacts. The last slider depends on the image and the other settings and can increase or decrease sharpness.

I followed my own advice and used the default values in the subtool. I set the sharpness, changed first level to unchanged and dragged out another contrast curve before I pulled up a 300 % view for a good look at the increased noise.


If it had been much worst I might have increased the Lum settings. Instead I went to wavelet denoise

*****


A combination of denoise and impulse noise reduction from the second detail tab--combining the two is a class 3 tip --cleaned up real noise exposed by sharpening and a few L shaped artifacts visible in 300% view.  Since the goal of this workflow was to fix the darkest area in a ISO12800 image we have to live with some loss of sharpening.

I left the bottom denoise slider at zero. Ever since I began working with wavelet I wondered why anyone would add a slider that increased the noise to a noise reduction algorithm. Jacques latest RawPedia article explained all.  Take a 30sec dark night image and the slider brings out the stars in all their glory. Another example of what seems useless or worse with one type of images my be very useful with another quite different type.

The developers didn't include all the sliders in a big joke to confuse us users. They all have a purpose and it's our job to work out the neat little photo tricks they allow.

In his RawPedia article Jacques also cautions about not expecting decent results if you use a saved pp3 on a different image. On this I think he is being over cautious. If you use a saved pp3 that was perfect for a close up of a rose in bright sunlight on one of the ninety concert hall stage shots of your favorite pop-rock band you won't be happy. But if you develop one of the stage shots and use it in the file browser to develop the other 89 stages shots you are well on the way towards fine tuning the three perfect shots you will post and brag about on your Facebook page.

*****


I used a parameter curve in the new Fine Tune tool to even out the lighting in the corridor, Now the histogram is bunched up in the center and needs to be expanded for a better black to white contrast range. So I went to CIECAM.

*****


CIECAM contrast and a touch of colorfullness fixed the problem, So how did we do?

*****


Photographybogs.com's untouched camera jpg vs RT's greatly improved jpg.

*****


A roughly neutral grey S/N improvement from about 10 to almost a 100...

*****


at the cost of a very slight loss of contrast--see the lines on the meter--that no one would notice if the two images weren't shown side by side.

 *****


A scaled down version (for the blog) of the original photographyblog jpg and the RT jpg. If you aren't impressed you must be working for an enemy big bucks image editor company. (grin)

Monday, March 25, 2013

Creating Noise Profiles

I was asked what I use to create noise profiles. It is ImageJ'  a free cross platform Java app from NIH.  The best and ad free download site is from NIH-- http://rsbweb.nih.gov/ij/download.html

Once you have it installed  open your photo and choose your line type. Drag it across  the area of your photo where you want to measure noise.  Cntrl+K creates the graph.


To  change the Y scale of the graph go to edit, options, plot profile options


For  my measurement in the black area of this poster I picked  min 0, max 40


Once you have a flat noise profile, go to analyse, measure or hit Cntrl+M

For an accurate noise measurement signal average several. This is a square law thing so 4 measurements doubles your accuracy and 9 measurements triples it. Summarize will do the math where your Signal to Noise (S/N) is the Mean divided by the StdDev (Standard Deviation)


Is this conventional statistical definition of S/N to best way to characterize photographic signal to noise?Probably not.  Noise peaks, especially colored noise peaks, that jump out of the average noise are far more distracting than a mild increase in the average noise. So is pattern noise.  Both these noise problems will become lost in these numbers. But if you do these comparisons carefully ImageJ is a very useful tool for working out how well the various combinations of sliders and methods work for you.

Final note.  You can not save a picture of your graph directly in ImageJ. 'Save as' creates a spread sheet file, 'Clear\' clears out you mistakes and 'Rename' allows you to start a new results list without losing your previous numbers.

Again if you want to know more about noise read Emil's article,  http://theory.uchicago.edu/~ejm/pix/20d/tests/noise/noise-p2.html


Thursday, January 17, 2013

Tone Mapping using CIECAM02


Edit--Preliminary results of the "Perfect Monitor Chase" (see next post)
Compared to flat screen monitors my Sun workstation monitor is too dark by about .5 ev. So what I thought was perfect exposure and color--what this blog post is about--will--most likely--look overexposed and washed out on your monitor.

Why 'most likely'?  Because flat screens are all over the place. My local library has a wide assortment. On Internet 7 this blog post looked pretty good. On Internet 2 its colors were so garish I cringed. So I leave this edit  by saying the examples I posted might look terrible but I still stand by the workflow instructions.

Plus, if anyone knows an accurate way to set up the gain and bias of the three RGB guns in this beast leave a comment to point me in the right direction.


In my last post on CIECAM02 I mentioned tone mapping  without going into details. While I did have a build, #181, that integrated both tools, my sys7 64 bit windows system did not like the build. It was compiled on a 32 bit Linux computer and worked great with that operating system.  But it came without a windows installer to register  its dlls and after an average of ten slider adjustments it crashed. Not an ideal way to learn how to use a new tool.

Edit  Build 185 is now available for both 32 and 64 bit PCs. Looks to be rock sold and faster than before.You can find it at Ollis's site:
  http://www.visualbakery.com/RawTherapee/Downloads.aspx


Despite the crashes, the build gave off hints of great things to come. So, without any great expectations of success, I went down to the old office turned junk room to dust off my old 32 bit Vista machine. To my surprise, as long as I didn't run out of memory during a conversion, the build worked.


I started with a snap of Matilda before we went to the bowling alley for Charlotte's birthday party. It was the first in a series so I suspect I took it to test the lighting conditions. Not a totally bad snap, but it needed fixing before I could email it to Matilda.

Without going into the details which I'll save for after a final release, here are the results.
The old way, using LAB mode and without CIECAM02.


And the new way


Before CIECAM02 I might have been satisfied with the first version, but there is no question that the second version does a much better job correcting the blown highlights in Matilda's hair.

Her face is still shaded more that I like with red channel number of about 50 percent. If I increased the strength of the tone mapping to lighten it, white blotches with a black center appear on Matilda's little hair pin and then on the blown parts of her hair. This is not a bug. The white happens when tone mapping runs out of data (RGB 255, 255, 255) and the black when the algorithm overflows. On PCs and perhaps MACs this produces a negative number, something RAWTherapee and other image processor interpret as black. (RGB 0,0,0).  Even RAWTherapee can't fix everything.

In my last post I also said I hadn't found much difference between the three 'lightness vs xxxx' algorithms. This time, with Matilda's hair, the 'lightness vs chroma' worked best. CIECAM02 also has its built in "lightness' curves. I used those to bring up the red channel on Matilda's forehead to about 62 percent.


Which brings up another complication. After I installed my #181 build on my old 32 bit machine I created the three tone mapped images. They looked good downstairs. But when I brought them up to my 64 bit machine they looked much too dark.  Last summer  I blogged about how accurately I calibrated the antique Sun Workstation monitor using paint chips but CRT monitors do drift, especially older ones. As for the monitor downstairs, it is a flat screen that I bought in a garage sale for $2-- one not guarantied to be on the gold standard for monitor accuracy.

My laptop and third computer is currently in parts since I have to replace its CPU fan, so I went over to my next door neighbor to check how the images looked on his new laptop--somewhere in between what I was seeing on my computers.

This is a problem that the old timer darkroom print folks in my computer club have been trying to pound into the heads of us new timer digital folks. You can not guarantee how light or dark the images you slaved over to get perfect will look when they pop up on other people's monitors out in Internet Land. So if you enjoy these tutorials  please take a moment to add a comment--just a 'too dark' or 'washed out' or 'about right'  to let me know what you are seeing.  Blogging on how great RAWTherapee is while using bad imagery isn't convincing.

Double Thanks.
scribble


EDIT
Sorry if you ran into the "prove you are not a robot" thingy during a comment. Now off. So comment away.

Tuesday, September 25, 2012

In Search of Perfect Color--the New Tone Curves


I shot this a while back at the Villas Zoo during its hundredth anniversary celebration. The Young Shakespeare Players were putting on a performance of The Winter's Tale in the zoo's meeting room.  I caught these performers in a  darkish corner and ended up with a not particularly exciting ISO1600  snapshot.


But after some very quick editing I turned the snap into this.


How quick? Here is my workflow.
1-loaded the snap into RT's default mode
2-set the highlights with a single drag using curve 1 of the new dual tone-curve set in the Film-like mode


3-set the shadows with another single drag using curve 2 in the Weighted Standard mode.


4--adjusted the exposure slider to move the histogram to the left for saturated blacks in the actor's hair and costumes. 

5-dragged noise reduction sliders to roughly the settings I used for my last blog post.

6-developed and then cropped the finished image in Irfanview. Why Irfanview?  Because in my excitement to see a final image I ignored the clutter surrounding my intended image.

Total working time now that I know what to do --two or three minutes per image  Be less if I batch process the other ISO1600 snaps I shot before the play began. Not quite a one click clean up but RT is getting close. Plus the results are-- pure magic!

Two things you learn when you first take up image processing:
1-unless you have developed perfect technique, usually after decades of  professional photography, images straight out of the camera improve with an S tone curve.
2- RGB colors will shift when you apply your tone curve.

Applying a S-curve multiplies the color number in all three color channels by whatever numbers are created by the tone curve.  Consider the RGB color  75,128,175 as an example. With a curve fixed at the  grey point, 128, the red value will go down, the green will stay the same, and the blue will go up creating a different color. Since images and tone curves are unique designing a reasonable algorithm that can follow and corrects these color shifts becomes near impossible .

LAB mode is different. Tone curves in the L channel doesn't shift color. Unfortunately, correcting skin tones and the like with LAB's A and B channel curves is also near impossible.  But with the RT's four HSV tone curves, near impossible is moving in on routine.


For those not familiar with HSV terminology the hue is the color.  The chroma or saturation is the intensity of the color. The value is the brightness of the color. You can read off these numbers in RT's left history pane.

RT now has four different ways of creating a tone curve: Standard, Film-like, Saturation and Value Blending and Weighted Standard. I'll leave it to the RT programmers to explain the inner workings of the new algorithms in a promised tutorial because I suspect I'll get the details wrong. Whatever the details since you can mix  and match the methods with dual curves you don't lack for ways to create excellent images.

EDIT: For more info on the four tone curve types you will find an updated manual at https://docs.google.com/document/d/1DHLb_6xNQsEInxiuU8pz1-sWNinnj09bpBUA4_Vl8w8/edit?pli=1


First why dual curves? In my example I created an S-Curve by combining two curves. This may seem like a needless complication--my first thoughts--until I saw how well and fast it works. And if you don't care for this new fangled innovation, set curve2 to linear and ignore it.

Below is a test image that one of the developers, Michael, posted. The differences are subtle and are best viewed at original size but in the dual curve version the skin tones blend in more smoothly as the lighting slides from highlights into shadows.


I haven't tested all the combinations in any systematic way but here are some tips I picked up from issue 1529 in the google code where many test images were posted.

Two standard curves (above) work well on skin tones.

Brightening with Film-like adds saturation and gives richer colors. So does switching to a wide gamut working space like ProPhoto. (I've tested this). But if you like your colors less vivid Saturation and Value Blending is the best choice.

Weighed standard for darkening and Film-like for lightening--my example--are a good combination for people pictures.

All methods work for landscapes. Selecting a mode depends on taste

Conventional S-curves work best with Saturation and Value Blend

Whatever curve modes you settle on, this unique feature is a major addition to RawTherapee's tool kit.

This version of RT 4, build 138, can be found at: http://www.visualbakery.com/RawTherapee/Downloads.aspx   An updated manual is at: https://docs.google.com/document/d/1DHLb_6xNQsEInxiuU8pz1-sWNinnj09bpBUA4_Vl8w8/edit?pli=1  


Monday, February 20, 2012

Mistakes--Serendipitous

By Madison in Febuary standards last Saturday was balmy. Despite the sunny, mid 40's weather my D7000 and I spent the afternoon indoors at the Olbrich Garden photographing the Children of the Rain Forest.

This month's performers were the Hale O Malo Polynesian Dance Group, Their costumes and dances ranged from a New Zealand  Maori war dance to a Tahitian fertility dance. That invocation of human fertility came with a friendly warning, "Do not attempt this at home."


This image was shot during the pictures-with-the-kids session at the end of the show using my new Tamron 18 -270 mm f3.5-5.6 super zoom set at 18mm wide angle.  The manual exposure settings were f8 and 1/200 sec combined with an auto ISO. That ended up at 6400.

Not an optimum or necessary ISO for this image. It could have been much lower.  At 18mm the lens opens at f 3.5. For a static shot a shutter speed of 1/60 sec would have worked. But I had set up the camera for telephoto dance images, 1/200 sec to give a sense of motion without excessive blur and f8 to sharpen up the lens's slightly soft long end. I didn't spot any massive noise problems when I reviewied the screen shots during the shoot so I went with the default settings.

For post processing I downloaded RAW Therapee's latest 64 bit build, version 4.7.01. It doesn't have the new noise reduction routines yet, but it does have enough new features to  justify a build jump from 4.6 to 4.7.  I'll talk about a few newfeatures in this post, plus some older ones that I haven't used much, starting with the big review images in the file browser.

With dance groups I tend to over shoot.  You know, long continuous bursts hoping to capture that perfect combination of step, twirl and jump. This time I filled my 16 GB main card and moved down to my 8GB secondary card. There I found Miss Thumps-Up posing for Mom's perfect snap combined with an interesting environmental background.

Viewing the preview jpgs full size on my laptop screen while using the number and color coded ratings sped up my selection workflow. I ranked my 'maybe images' during a first pass and then fine tuning the selection set. Definitely a winner.

Judging by the curve of the molding board at the top, this image, shot at 18mm, has serious wide angle lens distortion.  So I tried the fix in the Transform/lensgeometry/distortion tab. My first guess, a -0.5 pincushion setting went way over the top. But it did open up ideas for some creative playing around later.


The for real setting was -0.09.  I pulled up a grid Guide Type to provide straight lines as a reference. At the moment the routine bends the image only one way and creates a curved blank area at the bottom. So I used auto fill to clean up that problem. And for those interested in composition rules the Guide Types include rule of thirds, rule of diagonals and several harmonic mean or, as I used to call them, golden sections.


With the proper settings I created an '18mm tamron' default profile that I can call up to automatically correct my wide angle images.

This fixed I tried out a  new profile that came with RT 4.7-- 'default ISO high'. After I applied the profile  it was  'WOW!! Where has all the ISO 6400 noise gone!!?'

Turns out the RT team had done some interesting things but the real WOW maker was my serendipitous mistake. I'd been working with the jpg not the NEF file, a jpg that had already gone through one pass of the Nikon D7000 excellent in-camera noise reduction routine.

I posted twice last August about how well RAW Therapee works as a jpg editor   My mistake turned up another use- one that is especially helpful to someone who shoots flash-less low light party and people photos.

Here is the most interesting settings in the 'default ISO high' profile along with my modifications.


I left the Impulse Noise Reduction at 80. Luminance comes up as 0 so I set that to 20. Gamma 1.2 has the effect of shifting noise reduction into the shadows where it is needed the most. As usual the effect of all this is to blur detail (bad) while removing noise (good).

The RT folk's ingenious addition is to use 'contrast by detail levels' to recover a surprising amount of the blurred detail. The default values are 0 (finest) =1.00 and the next level '1' =2.00 but at the time I was thinking noise rather than detail;  So I may have gone a little too far fiddling with the sliders and cut out slightly more detail than the noise reduction needed. Either way, the noise cleanup and preserved detail  on this ISO 6400 image is dramatic.

How dramatic. Here are my results. And unlike the Tahitian fertility dance you should definitely try this at home.


The image on the left is from the NEF using the current noise reduction routines. It has the highest noise. It also has the most preserved detail in the girl's hair so I could have pushed its noise reduction harder.  The middle image is the jpg from the D7000 using its default jpg (Sd) and noise reduction (norm) settings. While I wouldn't have called it bad a week ago, now it looks flat and washed out next to the RT image on the right. I lost some detail in the hair but with the noise now so low I can print it up large, perhaps to 11 by 14, without showing objectionable noise. Not shabby for an ISO 6400 image.

Lesson learnt. At the moment there is no advantage working from NEFs using RT. Not that this is a massive bash; the D7000 has one of the best in-camera noise reduction algorithms around. And judging from the comments in the forum, RT should get better soon. See Issue 1052: New luminance NR algorithm  http://code.google.com/p/rawtherapee/issues/detail?id=1052  for up to date details.

With a CPM member's show coming up and several low-light images I'm considering exhibiting, it is time for some serious post processing. Will let you know how everything works out.

PS. The line profiles were taken off the wall over the girl's shoulder.


Monday, January 23, 2012

Noise Reduction RT vs 'the others'


Two months or so back I had this post all planned out  The 'other' was to be my antiquated version of Adobe Camera RAW that came with Photoshop CS3. When I compared the noise on two of my images RT clearly lost with one image but tied with the second. Slightly confusing.

So I checked the RT forum  to see if there was some info I had missed. There I learnt that the noise reduction routines were being  rewritten.  I decided to wait for the revision. Then life interfered with blogging and I didn't come back to this until a few day ago.

mbod had already done the comparison where his 'other' was NeatImage.  The link for the discussion is http://www.rawtherapee.com/forum/viewtopic.php?f=1&t=3708  He provided this screenshot; I measured the noise in the sky with ImageJ


The interesting thing about these measurements is the noise profiles are nearly identical even though the RT processed image on the right looks much noisier. (click to view original size) That's caused by the relatively large chromatic blotches emil talk about in the forum post. They are what you see but since a line profile only measures noise that is a pixel wide, it makes the Signal /Noise look better than it really is.

Normally I do most of my photographic work on my 32 bit desktop machine. While I have 32 bit memory management problems, I also have a semi ancient Sun workstation monitor that was built to last.

And has lasted. With a large 1600 pixel screen, the monitor can be calibrated and color managed so the colors and values on the screen are identical to those I see on my prints. Just as important when I raise or lower my head, the image intensities don't change like they do on my laptop screen.

But this time I used the 64 machine after I downloaded mbod's RAW file. And I was surprised by what I saw after I ran it through RAW therapee.

The noise profile of the 64 bit jpg (left) was much less noisy than I expected. More important it didn't have the chromatic blotches that I have in my 32bit jpg (right) and that mbod had in his conversion.  (click the screen captures to view their original size). Big shock to discover there was that much difference between the two versions of RT.


     Both jpgs were converted using identical settings. The formula used was exposure compensation to correct for underexposure followed by RL sharpening with a radius of .50 and amount of .24. This was followed  by impulse noise reduction of 75 and luminous noise reduction of 49. All other settings were left at the default values.

glascort also posted a NeatImage conversion which I compared to my 64bit jpg.  While my noise is 4 times lower I lost fine detail like the guy wire on the tower (circled in red).  Larger detail like that on the side of the building (circled in blue) wasn't affected. But there is no question that my version is less crisp than the glacort's version.


That turned out to be rather easy to fix. I loaded the 64bit jpg into RT and upped the Lab mode contrast to around 30. That brought out more noise so I added a bit more impulse noise reduction. As you can see in my reworked jpg on the left, the noise is still lower than the NeatImage jpg, the overall image is as crisp and I recovered the lost guy wire (circled in red).


   While I don't have any of the 'others' installed on my 64 bit machine yet, I feel the current 4.0.6.3  64 bit noise reduction is quite good. So we might be far closer to overtaking ACR than some believe.

Sunday, November 20, 2011

Sharpening--My Workflow

My next RAW Therapee tutorial was going to be a comparison of RT's vs ACR's noise reduction routines.  Unfortunate ACR was winning. Then I learned RT's noise reduction routines were having a major rewrite--see issue 1052 on the forum. So that tutorial is on hold while I wait for the new goodies to show up in an official build.

This tutorial on sharpening is short and I hope sweet.

I'm using a combination of RL Deconvolution and Microcontrast on most of my images. I can push things too hard and oversharpen but even then I don't create unsharp mask style halos. Compare the siding of the house in 200% box. Click on the screen captures and flip between the two images at the bottom of the screen for the best views.

With sharpening on and at or close to the default settings.


And sharpening off.


Wednesday, September 28, 2011

A Golden Sky

Last Thursday in the ongoing pursuit of bargains, I took a break from more serious errands after I spotted a garage sale sign. A good number of blocks later without passing a garage sale I was about to turn around.  Then I spotted a second sign. Since it was mid afternoon of a blustery rainy day the sign was half blown over and not immediately readable from the car.  But since its road only went one way I turned and headed down the side street.

This time I drove several winding looping blocks without a hint of a garage sale.  Then I came on an entrance to one of the city's many neighborhood parks. For the moment it wasn't raining and my D7000 kit was on the back seat so I stopped to explore any photo opportunities. And found this addition to the photographic genre, atmospheric skies.

Yes, for the zillionth time I forgot to switch the white balance to auto after I finished shooting indoors under compact fluorescent lighting.


But that is what the white balance dropper is for. I clicked in the circled area.


And ended up with this image


Sort of what I was after--an essentially monochrome RGB image. But it lacked that extra punch.  I decided to experiment and see how well RT could tone this image.

The HSV flat field editor in the color tab had worked well on other more colorful images.  A disappointment here. With so little color to work on, I saw only a slight shift towand red.


I went back to my tried and true toning procedure-LAB mode in the exposure tab. As I've blogged about earlier the b color channel controls the ratio of the two complimentary colors, blue and yellow. Took only two simple drags to adjust their ratio and few more slider adjustments to fine tune the image.

A couple builds back I would have stopped here  but there was one more routine to try, the channel mixer.


Because of bugs it hadn't worked as expected the last time I tried it on some infrared images. But according to the RT forum, all those bugs had been swatted in time for the latest 4.0.3.4 build.

Nobody fibbed.  I moved the slider around without any particular plan or science until I found a richer color than I had using the LAB mode.


The  final image.


So download RT and try it on your images. You won't be disappointed.

PS. On my way back, I passed the garage sale a couple blocks farther down from where I made the wrong turn. Bought a neat junk/ treasure that will be used-a heated coffee carafe complete with a thermostatic control that varies the temperature from just lukewarm to burn you tongue.

Now, while I drive on a photo day trip, my coffee fiend of a wife can sip her favorite brew as she scans to countryside for more photo opportunities.

Serendipity,  wouldn't you say.


Wednesday, September 14, 2011

Sharpening with RAW Therapee-- Part 1

Let's start way back at the basics. What makes up the pic of your dog that you just brought up on your computer screen?  A very long list of numbers.


This is a small sample of the 5,161,117 numbers that make up my DSC8706 jpg   It's at the boundary between the header--the zeros at the top-- and the numbers that tells a computer how bright or dark to set the three colored dots that make up the pixels on its computer screen--the hexadecimal numbers at the bottom.

At the top of the header is the EXIF data--the list  of camera settings. Following that is more data about the lens I used.  Finally there are pages and pages of zeros that I could fill up with metadata. If I looked up the ascii numbers for 'This is going to be tedious!!' and individually replaced some of the zeros that sentence would show up in the metadata. If I still hadn't used up all my tedium quota for the day and replaced the picture data with zeros I would eventually draw a black line across the top of  DSC8706.

Once upon an ancient time that was how data editing was done.  And shortly after that ancient time, when monitors that could draw pictures appeared beside humongous CPU units, programmers began writing image editors to take away the tedium of doing such mathematics on these lists of numbers.
 
Sometimes we only want to modify a pixel or two--covering up hot pixel noise--but usually we want to do mathematical operations on all or a good part of our image.  For example, to increase the effective exposure by a stop we multiply the image numbers by 2. Or to decrease it by a stop, we multiply by 0.5. Or we multiply them by a range of numbers that depends on how far and in what direction we drag a point on a tone curve.

To sharpen an image with an unsharp mask we do "a simple linear image operation—a convolution by a kernel that is the Dirac_delta minus a Gaussian blur kernel."  As per  http://en.wikipedia.org/wiki/Unsharp_masking

All clear and understandable?  Right?  Or did you party big time the night before that early morning math class and  could use a refresher explanation? Maybe you even forgot how you sharpen an image with, of all things, an unsharp mask.

Unsharp masking goes back to a time when you would stick your head under a big black cloth and take your image on a large single sheets of film.  Once you developed  your image of a black bird flying up in the light blue sky, you would have the B&W negative, a white bird in a black sky. If you projected this on another sheet of film, after development you would be back to a positive, a black bird against a lighter sky. If you did this as you would with a print, well focused, you would now have a  'sharp' mask.

Which wouldn't be much use. Instead. if you defocused your enlarger you would have a blurry and wider positive of your black bird, your 'unsharp' mask.  When you carefully aligned the original negative and its mask and put the stack in your enlarger you have a halo around the edges of the black bird. This combination will make a print with more edge contrast than a print made with just the original negative. There isn't more detail but because of the way our eye/brain system works this print will look sharper.

Back in those film days this was another  'great in theory' procedure that hardly anyone ever used.  It wasn't until our digital days when all you had to do was move a few sliders to  ' convolute them sharpening kernels' that it became part of a photographer's digital development work flow.

Since a quick google of  'unsharp mask tutorial' will show why the world doesn't need another unsharp mask tutorial, I will talk about what happens when I go out my way to do it wrong.

Instead of a blackbird I start with a seagull flying over a field and pond--a peaceful and quiet country scene. (Which it ain't. The second largest mall and one of the busiest intersections in the city was behind me.  A tidbit of info I'll toss in to point out that in photography framing may not be everything but it is still is a good hunk of everything.)


I ran the unsharp mask sliders up as far as RT would let me before I decided that image would be too ugly even for this do-it-wrong tutorial. So I pulled them back slightly.

Usually I see white halos when I over-sharpen, but that is because nature gave us far more darkish subjects than pure white subjects to photograph. The bird's white head has a well defined black halo while its black feet has a more traditional white halo. In the third window where there isn't much contrast between the upper part of the inner wing and the soccer field the halo is barely visible.


Traditional versions of unsharp mask have only three sliders--radius, amount and threshold.  RT's version has five--Sharpen only edges and  Halo control. Sharpen only edges work to prevent the sharpening of noise noise pixels. I'll go into that in another tutorial.


Activating halo control didn't completely eliminate the halos, I'd gone too far with the other settings, but it did reduce them considerable. With more normal setting, a radius of 0.8, an amount of about 150 and the default threshold of 512 I doubt I would have had to use halo control.

In the end how did I sharpening the image? By using only the contrast by details routine, a feature not found in other RAW (or jpg) converters.


What this routine does is use some fancy math to select areas that have details. The areas range from 1 or 2 pixels wide (Finest) up to about 16 to 20 pixels wide (Coarsest).  Then RT multiplies those areas by whatever number you select to make them stand out in the image. Or stand out less in the image if you move the slider towards zero. With a high ISO images, one to two pixel areas are almost always noise spikes. Then I set the Finest slider down to around zero.

As with all sharpening routines it is easy to get carried away. With flower macro images setting the numbers 1 and 2 slider to slightly under 2.0 works well.  With this image which has motions blur I went a bit farther in what I must confess is a rescue operation.

I was driving out of the parking lot of my bank when I spotted the seagull.  I had my camera in the back seat but didn't have the time (or forgot) to set the camera up for bird shots. I snapped this image at 1/500 sec instead of a motion stopping 1/1200 sec. While RT can and has hid many of my photographic mistakes, with motion blur it can't perform miracles.

And don't be surprised if RT slows down. It's one of RT's most CPU demanding routines. With 16.2 mp images and using a less than a speed demon, four year old, 32 bit machine it add a minute or so to the RAW conversion  But you will find the extra time worth it.


The top window is with sharpening, the bottom is without.

So, grab your camera and best birding lens and go off for the image that will wow the world.  RT has all the power you need.  The rest is up to you.